
Six simple secrets to a better photograph
I thought it about time I did some more tips for you dear reader, so I’ve popped together six simple secrets to help you make better photographs. Whilst the majority are geared towards portraits, they all also apply to all other areas of photography. So whether you’re shooting the kids in the park, or the Eiffel Tower at sunset, they’re all tips worth learning. So here goes, in no particular order:-
1. Get down to their level
When photographing kids, pets or generally anything smaller than you, get down to their height or even lower. Photos, particularly of kids from above don’t do them any favours, nor do they make great images. Your photos are better when you show engagement with your subject and this is much harder to do from above. They don’t have to look directly at the camera, the eye level angle by itself will create a personal and inviting feeling.

Looking down on the children doesn't make the most engaging of photographs. Image courtesy of the UN

This image shot at eye level engages the viewer far more than the image on the left. Images courtesy of the UN.
2. Move it from the middle
There are so many rules of composition, thirds, golden spiral, foreground and background elements etc etc but one of the first things you learn as a professional photographer that once you’ve learnt all the rules, start breaking them, but know when and why.
That doesn’t mean that putting your subject anywhere in the frame will make a good photo. Sticking it drop dead centre will undoubtedly create a weak image. Try moving them to the left or right so that they are a third of the way into the frame.
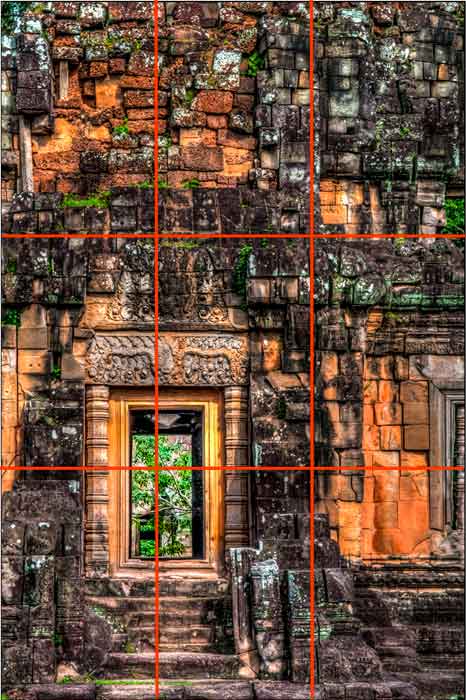
The viewer's eye is instantly drawn to the brightest part of a picture and in this image it is the doorway which I placed in the bottom left hand corner of the frame.
And here it is without the thirds lines. Had I placed the doorway in the middle of the frame, the photograph would be considerably less appealing.
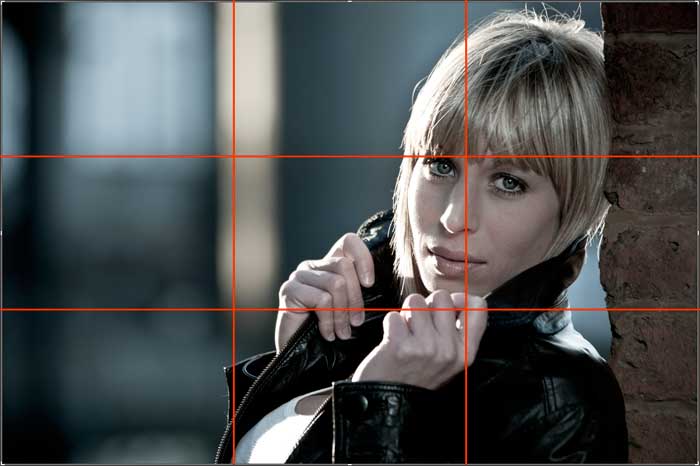
Similarly in this image I placed the model to the right of the frame focusing on her eyes and placing them to the top right.
An example of the crop overlays available in Adobe Lightroom. Placing your subject on one of the intersections will create a more appealing image. It's all to do with the brain and the way the eyes see things. Don't ask me to go into more detail, it's more than my little brain can cope with.
3. Move in closer - zoom with your feet
Particularly relevant if you're using a camera phone or a camera that doesn’t have a zoom. I know that most phones have a digital zoom, but don’t use it. You’d be far better off using your feet. Legendary photographer, Rick Sammon, puts it quite succinctly: "The name of the game is to fill the frame”. By doing this you will eliminate background distractions and show off the details in your subject.

Image courtesy of Viewminder
4. Use the flash outdoors
Even outdoors, using the fill flash setting on your camera will improve your images. Use it in bright sunlight to lighten dark shadows under the eyes and nose, especially when the sun is directly overhead or behind your subject. But know the range of your flash. Keeping it on whilst you're taking photographs of Ryan Giggs taking a corner at Old Trafford from Row ZZ isn't going to do a whole lot.

You will see from the shadow that the net has cast on the ground that the sign is very high in the sky. The girl's helmet puts her face completely in shadow making it difficult to see her face properly. Image courtesy of Soe Lin
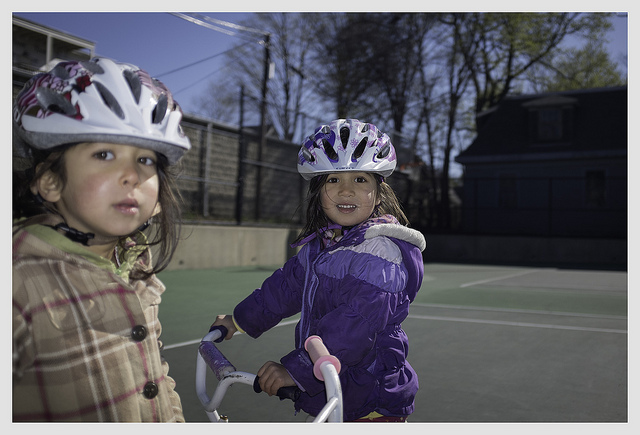
Here, and in the same harsh direct sunlight, the photographer has used on-camera fill flash to put light into the shadows caused by the girls' helmets onto their face. Image courtesy of Soe Lin
5. Direct
Take an extra minute to become a picture maker rather than a passive picture taker. Add some props, rearrange your subjects, or try a different viewpoint, up high or down low or even a different angle. Bring your subjects together and let their personalities shine.
Careful orchestration of the models enjoying the food makes for an engaging photograph. Publicity shoot for the Castlefield Hotel, Manchester.
Made as part of a series titled Crime? This carefully choreographed image creates mood and intrigue. See more of the series here.
6. Watch the background
If you’re portrait subject is stood in front of a telegraph pole, your photo may look like the pole is coming out of their head. Take a minute to look at your background and try and avoid any distracting clutter or bright colours.

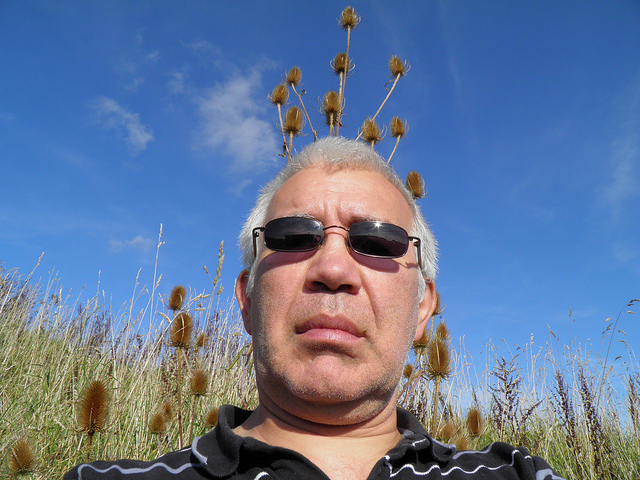
An excellent example of "pole in head" syndrome. Moving subject backwards a foot would have made him look less afflicted. Image courtesy of Christian Bardenhorst
Despite being deliberately done, this image shows perfectly the need to check the background before clicking the shutter. Image courtesy of rawdonfox
So there you go. 6 simple steps.... Any questions or feedback, feel free to comment below or email me direct.